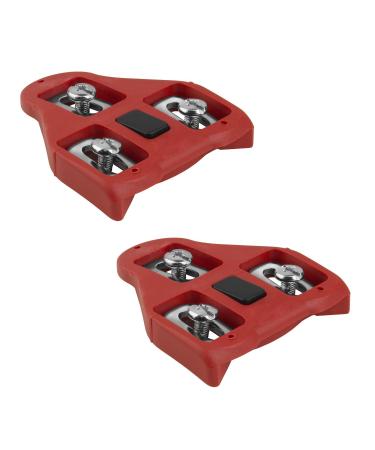
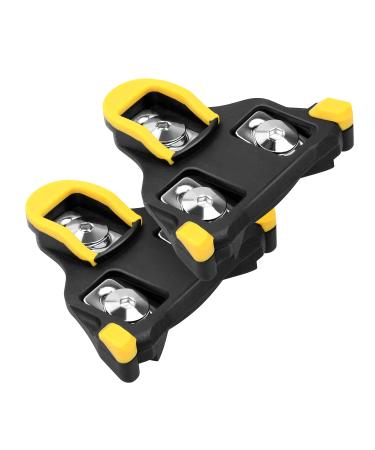
PRESENTATION AND ASSEMBLY OF THE CLEATS

BOTTOM VIEW
1:Adjustment:the 3 dajustment opening allow fitting the cleat under the shoe sole.These are rectangular and can be adjusted horizontally and longitudinally so that the sole can be accurately positioned.
2:Plates(6)
3:Cleat fastening screws(6):they shall be tightened using 4mm Allen wrench.
4:Anti-skid pads: These polyurethane pads control the risk of slipping while walking. Note: When any one of the anti-skid pads is seriously worn, it is recommended to replace the new lock piece to achieve the best use effect.
SIDE VIEW:
1. Bending radius: There is a bending radius on the back of the cleat,providing shoe sole the required camber which is essential to make shoes comfortable.The soles of shoes used with these cleats shall also have the same bending radius.otherwise the cleat might get out of shape after it is fixed and provide inadequate foot support.
2.Axle-pedal mark:this reference mark indicates pedal axle positon when the cleat is inserted in the pedal.
Cleat Installation:Caution:make sure that the cleats are suitably tightened under your shoes before snapping.After replacing the cleats and before using the bike,always make sure that pedal spring tension is adequate.If release is too easy or too difficult,this might result in fall and serious injury.Fasten the cleat to shoe bottom using screws and plates provided with the cleats.
Cleat Adjustment:
Step1:Cleat side adjustment:Center the cleat as much as possible under the shoe(sole fixing holes are located in the centre cleat openings).
Step2:Cleat adjustment lengthwise(at front/backend of shoes bottom).Most experts consider adjustment to be optimal when the reference mark on the cleat(indicating pedal axle)is located under the axis of inside metatarsus articulation.The axis of your inside metatasus articulation is located in the centre section of foot-big toe articulation.
Step3:Once the cleat is adjusted as stated above,fasten it to the shoe using the fixing screws.Tightening is done using 4mm Allen wrench.The tightening torque shall be set within 5.5~6 Nm range.
Step4:Engage your foot in the pedal and run a few meters with your bicycle. If your shoes collide with the bike, or your ankles and knees are unable to exert force or are overburdened, please adjust the direction of the locking tabs. Repeat this operation until you feel completely comfortable while riding.


![Stewart Freeze Dried Dog Treats Made in USA [Single Ingredient Puppy and Dog Training Treats - Grain Free Natural Dog Treats] Resealable Tub to Preserve Freshness](https://www.gosupps.com/media/catalog/product/cache/25/small_image/375x450/9df78eab33525d08d6e5fb8d27136e95/6/1/61gwbbixarl._ac_sl1500_.jpg)


